Continuing where we left off, we’ll begin with basic movements from the individual to the fireteam level. This topic is foundational, so if you haven’t read Intro to Infantry Doctrine, I highly recommend you do so to get the most out of this information. Keep in mind, this is military doctrine and with that comes a set of assumptions. If they don’t apply to you, then only pay attention to what’s applicable and discard the rest.
Individual Movement Techniques
Also known as IMT’s, these basic movements are the foundation for all movement. The big ones are the rush, low crawl, high crawl, and reacting to indirect.
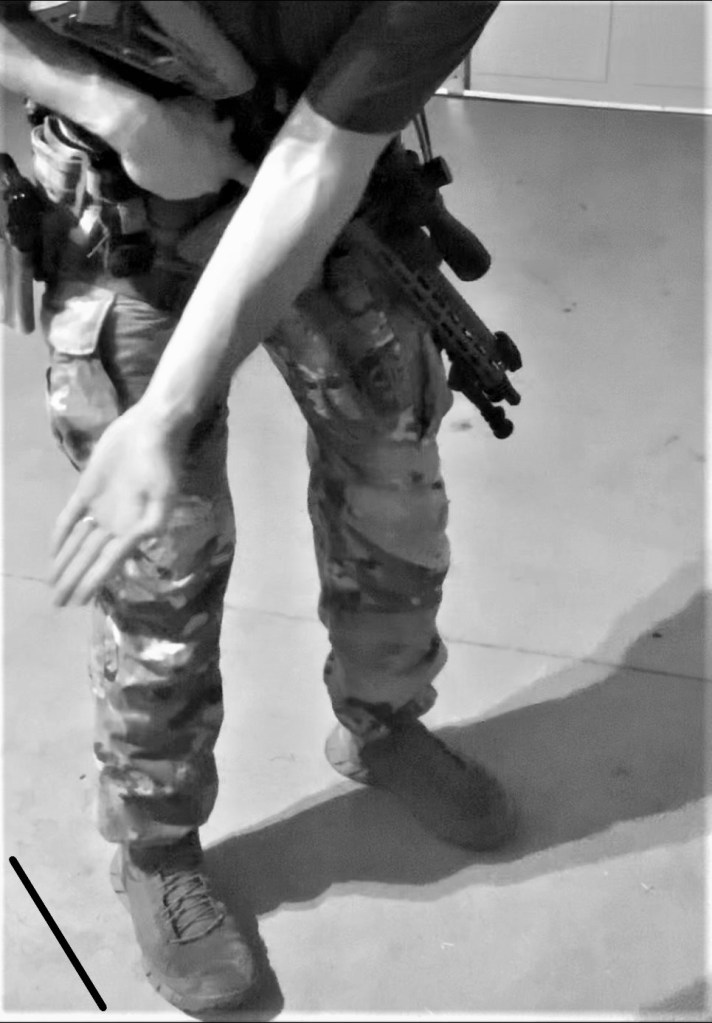
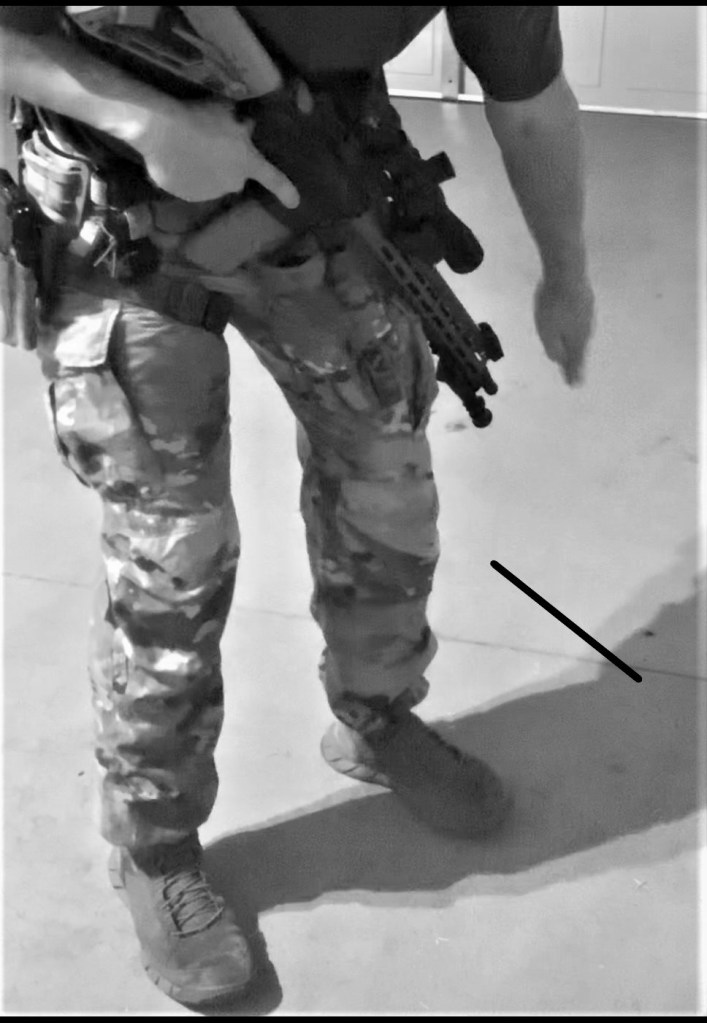
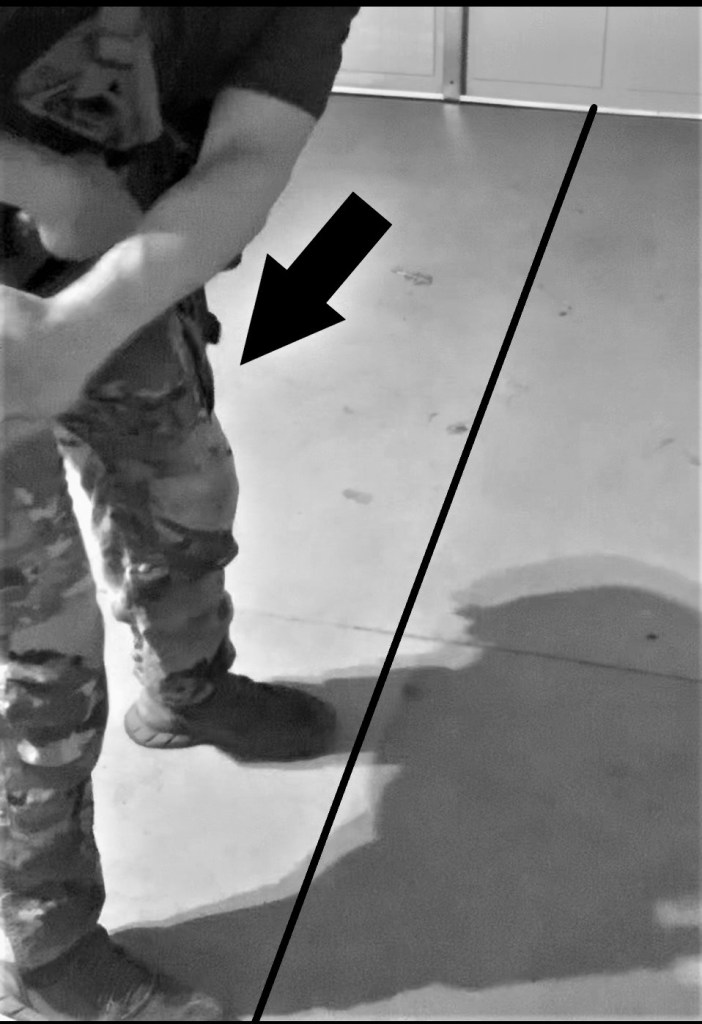
3-5 Second Rush
The rush is used when under fire to limit exposure to the enemy. In essence, you sprint as fast as you can for 3-5 seconds before quickly getting back down into a prone position if exposed out in the open or back behind cover if that’s an option. Return fire when not running to cover teammates when bounding (more on that later) during an assault or when breaking contact.
Unfortunately, this weirdo is the only example of anyone online who can perform the movement correctly. (Looking at all of your motard videos, cadets!)
The age-old saying to know how long to run is, “I’m up. He sees me. I’m down,” at a conversational pace. This roughly translates to those 3-5 seconds. Allegedly, studies have shown this to be the window of time before the average rifleman can acquire you as a target and engage you.
There are obvious caveats to this, like if the enemy has already been observing you and they’re waiting for you to leave cover. Is this technique perfect? No, but in bad scenarios it increases your survivability somewhat. Keep in mind you’ll most likely be bounding in a group. Because random people will constantly be getting up and down at random intervals, it’s kind of like trying to play Whac-A-Mole to the enemy engaging you. They can still get you, but this makes it a little harder for them. Obviously, the best scenario is understanding your enemy and the terrain to prevent getting ambushed in the first place, but sometimes shit happens.
Low Crawl
Next up is the low crawl, the infantryman’s most hated movement. While it’s the slowest movement technique, it does provide the lowest possible silhouette to the enemy. It’s mainly reserved for micro terrain when under heavy fire. Because low crawling takes away so much of your situational awareness, it’s a last-ditch technique reserved for situations where the threat of being shot immediately outweighs gathering battlefield data. Being in a situation where the low crawl is necessary is possibly one of the worst combat scenarios. You’re pinned down badly enough to limit mobility, don’t have fire superiority, and the likelihood of you getting flanked or having ordnance dropped on you is very high against a trained enemy.
To perform the low crawl, doctrine says to grab the M4 by the sling swivel, orienting the muzzle forward and slightly up. By grabbing the sling swivel, you’re dragging the M4 by its highest possible point without burning yourself on the FSB or barrel, from a presumably hot weapon given the situation. Dragging the weapon by a high point means the bore will be mostly kept out of the dirt and muck. Knowing that most AR-15 variants now have evolved with free floated rails and various QD points for slings, the main takeaway is to ensure that you aren’t filling up your bore with mud and sand when you low crawl.
The next part to remember is that only one arm and one leg can do the work at the same time. If you’re using your right arm, then you’re using your left leg and vice-versa. This isn’t to arbitrarily smoke you. It’s because alternating arms and legs quickly when you crawl (like in the high crawl) elevates your silhouette and prevents you from getting into the lowest possible position when moving. Remember, your dominant arm will hold the rifle to drag it. The arm you’re using will extend out in front of you, grabbing the earth, and pulling yourself up. In unison, our opposite side leg will bend at the knee and push off the earth to propel yourself forward. Simultaneously, your head will be sideways and laying flat against the ground. Unfortunately, your situational awareness will be non-existent from your head not being upright to look around. Also, half your face will act as a shovel as you’re dragging it across the ground. We lovingly refer to this as skull dragging. But your head will be in its lowest possible position to avoid exposure. Keep in mind, the low crawl is an act of desperation to avoid getting hit and nothing more.
High Crawl
There is also the high crawl. This is like the low crawl, except it doesn’t suck as bad. It’s the intuitive way of crawling on your hands and knees with your head upright to take in more information. It’s considerably faster than the low crawl, but at the expense of more exposure. The scenarios where this is employed are similar to the low crawl, just a little less extreme. You most likely have better cover, like a parapet wall on top of a building or perhaps you’re behind a taller berm.
Performing the high crawl is easy. Alternate your arm and leg movement, making sure the right arm is working with the left leg and vice-versa. Hold your rifle across your arms to prevent bore obstructions. The big thing to watch out for is keeping your butt down. As you increase the speed, there is a propensity for the butt to get higher in the air. This defeats the purpose of the movement.
Reacting to Indirect
Lastly, there is reacting to indirect fire. Normally, this isn’t listed under IMT’s, as it typically involves fireteam and above sized elements. However, because it relies heavily on the individual, I think it’s appropriate to list it here.
Indirect fire can consist of mortars, rockets, missiles, bombs, or any other projectile that doesn’t rely on line of sight between the gun and the target. In other words, the enemy just called in some hate on your position. Frankly, if an enemy calls in a fire mission on your position, you’re probably going to die if they have any decent tech, but there are a few things to remember to increase your chances of survival.
Sometimes there are ways to recognize if you’re about to get hit. Right before mortars impact, you can hear an almost whistle-like sound if you’re in the right (or wrong) spot. It’s unique and you won’t confuse it with anything else. Artillery or aerial bombs like JDAMs sound very high-velocity, like a whizzing sound with a rush of wind and some even say it sounds like sizzling bacon right before impact. Atmospheric conditions and your relation to the impact zone will obviously have an effect on your ability to hear this. The important aspect about recognizing these sounds isn’t that you’ll be able to react in time before the first impact, because you probably won’t. If you survive the first couple of rounds, you’ll know immediately what they are versus randomly witnessing explosions and not knowing if they’re IED’s, RPG’s, or something else. Having this knowledge will help you plan the best course of action for the situation.
If you suspect something, then yell “Incoming!” so your teammates know. The next step, if you aren’t in a protective structure or terrain, is to hit the deck. Lay down as flat as possible. When in the prone position, cover your neck with your hands. It’s the only vulnerable area exposed to shrapnel since your helmet and body armor cover most of the important stuff.
Second, make sure you’re lying on your weapon so that it doesn’t get blown away from you during the bombardment and so you can be a meat shield to protect it. It may seem counterintuitive to protect your weapon over yourself in this situation, but it makes a lot of sense. You’re laying flat anyway and your weapon doesn’t increase your silhouette too much from the bombardment. Plus, you’re going to need to return fire if you survive.
Lastly, once there is a lull in the bombardment wait for a command for distance and direction. The team leader may call out, “3 o’clock, 500 meters!” If you’re by yourself for whatever reason, then you’ll make this decision based on where the rounds aren’t impacting. You’ll choose a minimum distance of 300m to start and you need to get out of there fast. If there is an FO (forward observer) watching you, chances are they’re bracketing and making incremental adjustments until they fire for effect on you. (We won’t get into that on this post, as that’s worthy of its own from an actual expert.)
Here is a very detailed video straight from the Ranger Handbook that does a good job explaining the process. It shows a squad with an HQ element attached instead of just a fireteam but the fundamentals are the same.
Fireteam Movements
Now that we have individual movement responsibilities outlined, we can get into fireteam basics.
Wedge
The fireteam wedge is the most common infantry formation in rural terrain. It provides good security, situational awareness, and decent speed. This is a patrolling type of formation when the terrain allows it.
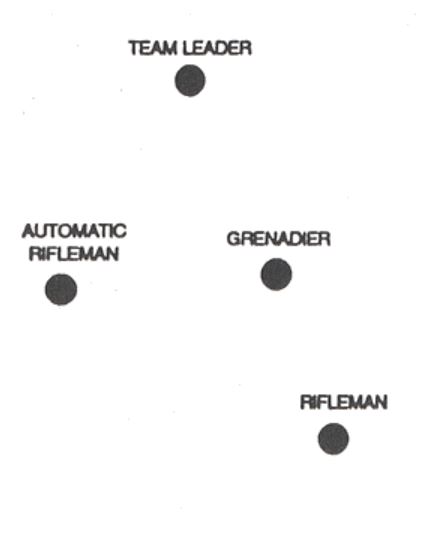
The fireteam leader leads from the front of the formation. His wisdom and experience help guide the fireteam toward more tactically sound routes. He is the point man, not to be confused with the compass man and pace counter doing the actual land navigation. Behind him to the left or right will be the grenadier and automatic rifleman. The automatic rifleman will be placed on the side where the team leader suspects contact is most probable. Your grenadier and automatic rifleman are nearest to the team leader because their weapons take priority. They are deadlier, offer tactical flexibility, and need to be placed optimally for guidance in a firefight. The automatic rifleman suppresses and the grenadier can engage combatants in defilades or through windows for instance. The rifleman will always be behind the grenadier.
To elaborate on this positioning, we need to understand the rationale of balancing firepower and the role each person plays. Since a fireteam usually consists of four men, one side of the wedge will always be weaker with one less person. Because the automatic rifleman has the most suppressive firepower in the team, he takes the weak side to react to contact with the most violence possible. Practically speaking, it’s better for the automatic rifleman to immediately hit the deck and return fire without worrying about anything else. Machine gun fire always takes priority over other weapons because it produces the most casualties and suppresses the enemy to enable maneuver. It’s also a less mobile position with a cumbersome loadout versus the grenadier and rifleman that can move faster to get on line to return fire if necessary. It should be noted that the wedge can have everyone instantly return fire in any direction if dispersion is good, but ideally everyone gets on line to focus their fire.
Dispersion between the positions is between 10-15 meters. This distance isn’t arbitrarily chosen. It helps minimize the effect that hand grenades, mines, mortars, etc. have on the fireteam. It’s better to lose one than everyone. Every casualty is bad, not only for morale but pragmatically. Multiple men have to carry that person (or body) and their gear has to be evenly distributed to fireteam members to carry it back. We can’t leave weapons and NODs to the enemy, although Biden would disagree, I suppose. This means every person is loaded down with extra weight and at least two people are combat ineffective from having to carry someone. Essentially, a fireteam of four turns into a fireteam of one after just a single casualty. This is why spacing is important in general.
File/Column
The file, or column to some, is just how it sounds. The fireteam lines up like ducks in a row, paying attention to spacing, of course. This isn’t usually a patrolling formation, as security is low. However, speed is very high.
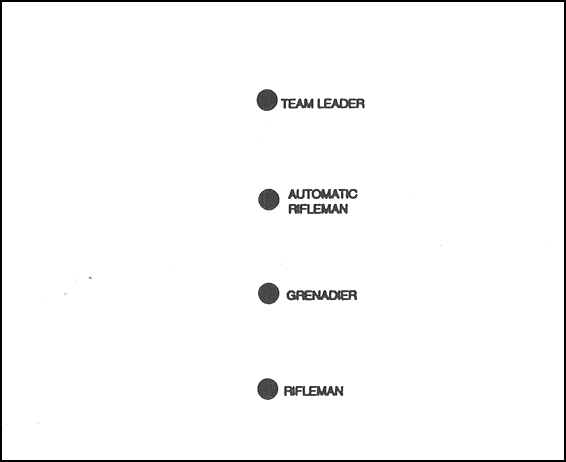
Files are typically used intermittently. For example, if a fireteam transitions from a wide-open area to an area with thick vegetation, the team may temporarily go into a file formation to help quickly navigate through the bottleneck before reassuming the wedge. It’s also used in battle drills, such as 1A (more on this later). Another example is crossing an LDA (linear danger area) like a road. No amount of caution or security will change the fact it’s a bad place to be. In these cases where terrain is tough to navigate or you’re overexposed, speed is security. It’s better to quickly get through these areas than methodically waiting to get shot. Maintaining good dispersion is ideal if it can be done.
In short, use the file when speed is the main concern. Some may argue it’s for thick vegetation as well, but the essence to that argument is really speed when you boil it down. Why send guys through thickets for the sake of maintaining a wedge when they can move past it faster with a file and become combat effective in a shorter period of time?
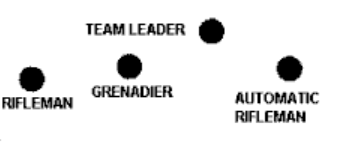
Staggered Column
Staggered columns are used when you have to move down a road or similar LDA. While this is highly discouraged, there are times when it’s unavoidable. Think about crossing bridges or patrolling in an urban environment down an alleyway.
The staggered column is identical to a file, except there is one file on each side, and dispersion is a necessity. Both of these columns are on the outer edge of the road or path they’re crossing. This enables each person to quickly jump off to the side and use a ditch or berm for what little cover they may have if they take contact. It also forces a shooter to pick one side at a time to engage versus being able to go cyclic right down the middle and take out men lined up like bowling pins.
The columns are also staggered, meaning no men are directly next to each other if you’re looking at the formation from the side. Staggering helps prevent mass casualties by strafing machine gun fire from enemy infantry, aircraft, tanks, or whatever unfortunate circumstance the element may encounter.

Line
This is the opposite of file. The fireteam is arranged in a wide pattern from left to right, horizontally versus vertically. Like the file, this is more of a transitionary formation and not used to patrol.
Dispersion is important to cover a wider area and to prevent multiple casualties from traps or enemy fire. It’s used when assaulting through an objective, typically with a supporting element like in BD1A referenced above. It’s also necessary to use when reacting to contact from pretty much any formation.
The golden rule is to never shoot over your teammates. (There are exceptions to this in CQB, where the person kneeling maintains physical contact with the person behind them and knows to not stand up, but these are specific circumstances when clearing halls or thresholds.) Shooting over teammates, especially from a few feet back or more, is a great way to commit fratricide. Even if you’re paying close attention to not flag the person you’re shooting over, the possibility of them standing up suddenly to maneuver or an external factor knocking you off balance makes this too risky to perform. Ensuring everyone gets on line prevents this. It also helps the fireteam focus its fire better toward the enemy.
Signals for Fireteam Movements
Every effort should be made to make communication silent when on patrol. Not only is it stealthier, but there are practical merits to it as well. Sometimes words can be misheard or not heard at all, depending on the situation. Giving a visual cue is an indicator that gets the point across immediately.
The following signals are Army SOP. You don’t have to follow these. Just know they have been tested under various conditions. The best analogy I can give for comparison is the NATO phonetic alphabet. Enough people have screwed up enough things over radios the last few decades that NATO has worked out what words can be distinctly understood under fire, with bad reception, or half-broken communications. This a good place to start for inspiration since they’ve worked out most of the kinks over the years.

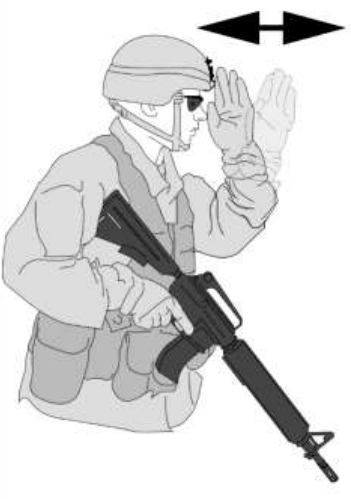
Wedge: Surf’s up, dude.
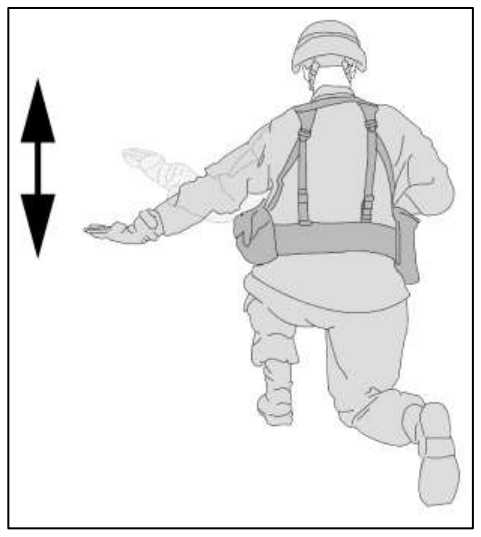
File: knife hand that moves back and forth directly in the middle of the head.

Pause/Halt: used for more admin purposes and typically not an emergency. Maybe the team needs to stop to gain their bearing on a map or to eat.
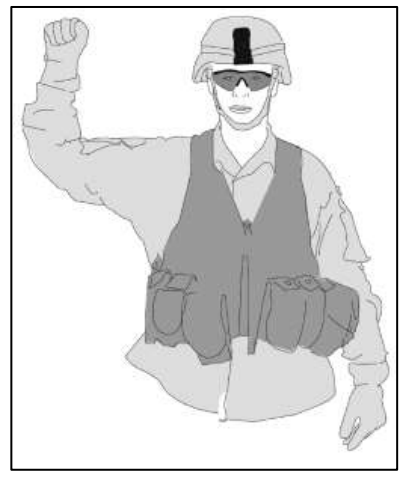
Freeze: used for emergent situations. Freeze means stop in place and don’t move a muscle. This would be used to prevent the team from walking through a trip wire or into an ambush.

SLLS (Stop, Look, Listen, Smell): used to take a tactical pause and take in more information about the area. Maybe someone thinks they hear a vehicle or someone talking in the distance. Maybe something looks off.

Assemble/Rally: used to bring the team in to brief or disseminate information.

Disperse: used when the team starts bunch too close together in formation and more spacing needs to be achieved. This becomes very common as vegetation get thicker and the team keeps transitioning from wedges to files, for example.

Enemy Sighted: self-explanatory. Point your weapon or your finger toward them.
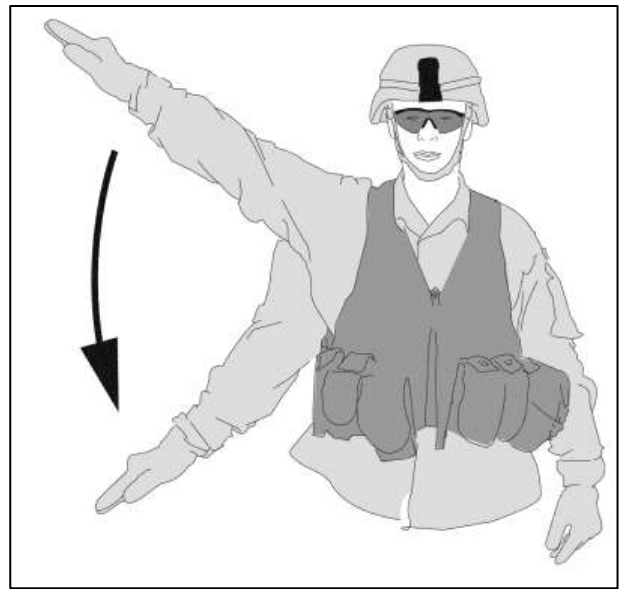
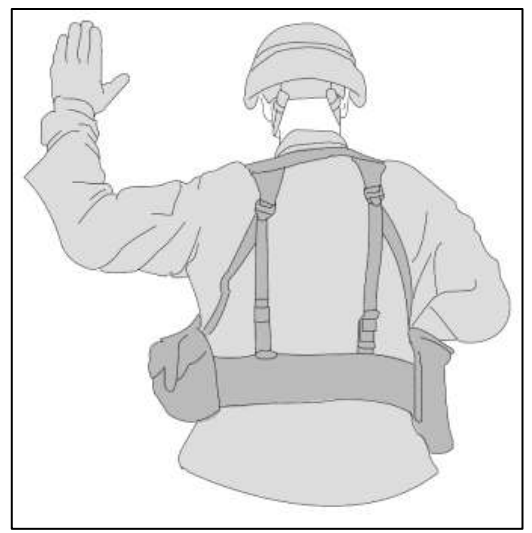
Get Down/Take Cover: self-explanatory.

Take a Knee: Alternatively, the leader in charge can simply take a knee and everyone else follows suit. They can also use the hand signal while taking a knee at the same time. I’ve seen it done all three ways and everyone understands it.
Go Prone: takes same approach as when taking a knee. A hand signal can be used, you can simply go prone, or do both.
Get Up: the exact opposite arm movement of taking a knee or going prone with the palm facing up.

Cease Fire: Sometimes not everyone can hear the cease fire command between gunfire and booms. A hand signal like this being passed down the line is necessary.

CBRN (Chemical, Biological, Radiological, Nuclear) Attack: pretty straightforward. The other alternative is yelling, “Gas! Gas! Gas!” if the element of surprise is gone. This is the exception to the one-hand only rule mentioned below for obvious reasons. No point in retaining your weapon if you’re dead.
Some with prior experience may notice these signals look different from field manuals or ROTC classes. This is because some of those signals require the use of both hands, which is unrealistic during an infantry type of patrol. One hand always needs to be at the ready on the weapon when possible. Because of this, some things have adapted accordingly and haven’t necessarily been passed around to other units or re-printed onto crappy TRADOC manuals.
To reiterate the point I’ve made before on part 1, this stuff is inapplicable to most civilians… until it’s not. Focus on what’s most applicable to you currently and then treat the other stuff as things that are nice to know. I believe the most important aspect of reading this material is not simply memorizing it. Knowing the minutiae of every detail won’t benefit you. Knowing how to think through a tactical lens and understanding the rationale behind these movements will give you a tremendous advantage, especially when combined with a little creativity and flexibility. Learn the information now while you still can.
That’s plenty of information for now. We’ll get into the really good stuff like bounding, squad formations, and battle drills on the next post.

One thought on “Intro To Infantry Doctrine, Part 2”